
I wanted to create a nice rich
dark stained top on this project
but I would need to strip it first.
I can only strip furniture outdoors,
and it was the wrong time of year
to do this work so I came up with
an alternative plan.
Here is a close-up look at the finish I created on the top.

FIRST LAYER: BROWN
I started by painting the top brown. Annie Sloan does not
have a chocolate brown paint at this time so I mixed my
own. You can make brown by mixing blue and orange, or red
and green, or yellow and purple. This is the first step to
making brown but to change hue and shades be sure to read this:
UPDATE:
More recently Annie Sloan Chalk Paint now has a
brown paint called Honfleur.

SECOND LAYER: CREME
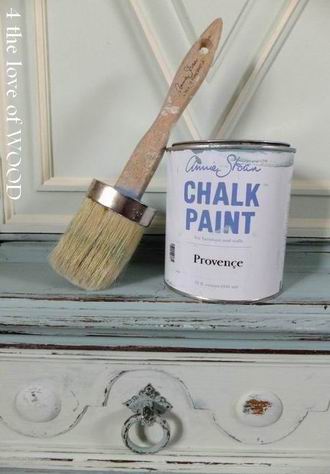
Then I painted the top with Annie Sloan Old Ochre,
a strong crème color. I waxed the edges on this layer to
strengthen this lighter color for distressing later.

THIRD LAYER: BLUE
The 3rd layer was Annie Sloan Provence, the same blue I
painted the body of the dresser. This layer was completely
waxed and distressed all over.

FOURTH LAYER: BROWN
Then came the final layer of the same brown I started with.
I used a clear wax for my finished look. You could try a dark
wax to get more depth but I wanted the blue showing through
to hold the same color as the body.


DISTRESSING: personal preference
Be brave and experiment when working on something
new like this.
Try different distressing techniques all on the same surface.
Use different sand paper grits and try sanding before and
after waxing.
Trying new things is what will achieve new results.


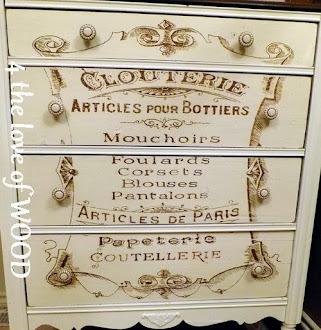
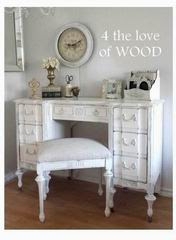
THE BODY - Blue & Creme
The body of this dresser was done much simpler by painting a
quick coat of AS Old Ochre, followed by a good layer of AS
Provence. Only clear waxing over the blue.

DISTRESSING: drawers
Below is a close up of some distressing done on the drawers
with a light hand and a 220 grit sand paper. Done right you
get to see the light color of the Old Ochre showing through.
All this sanding is done by hand.
with a light hand and a 220 grit sand paper. Done right you
get to see the light color of the Old Ochre showing through.
All this sanding is done by hand.

HANDLES: gold
The handles I used are original but they were almost a black
color. I wanted a warmed up tone so I lightly sprayed them
with a Tremclad gold hammered finish. I didn't want a solid
gold either so I washed them with some acetone so they
would have an aged gold feel. Acetone is the same as your
nail polish remover.


Isn't it gorgeous? You can see more of this dresser here:
INSTAGRAM @4_the_love_of_wood
********************************
Advertisement


TIL NEXT TIME